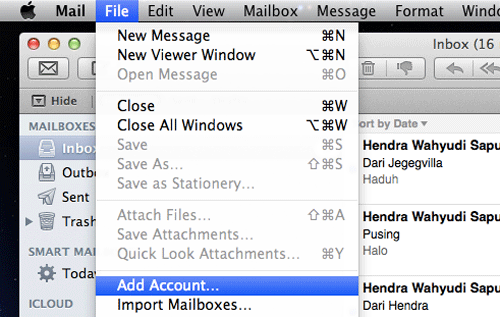
1. Open Mac Mail, click File > Add Account
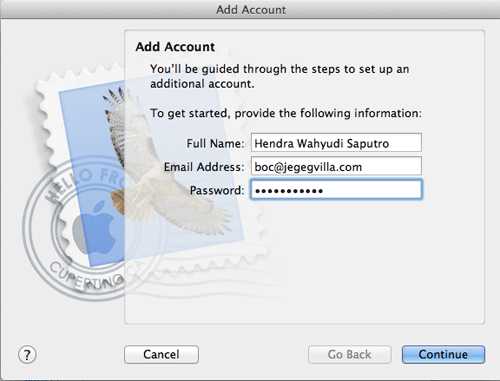
2. Fill in your name, email address and password on the coulombs provided > click continue.
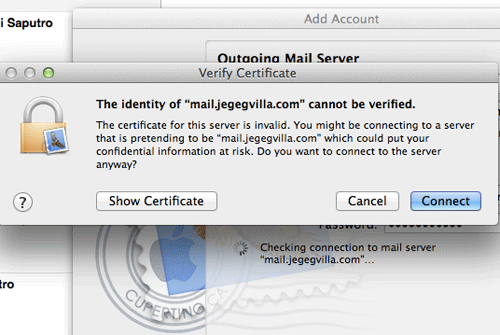
3. The system says can not verify the certificate, ignore it keep click connect.

4. Fill in all coulombs for incoming mail server that related with your email and server information, as follow. Completed and click continue.

5. Fill in all coulombs related with outgoing mail server, as follow. Completed click continue.

6. The mail system says can not verify the certificate. Ignore it and keep press Connect.
7. The mail system showing a notification that smtp server not responding. Ignore it and click Continue.
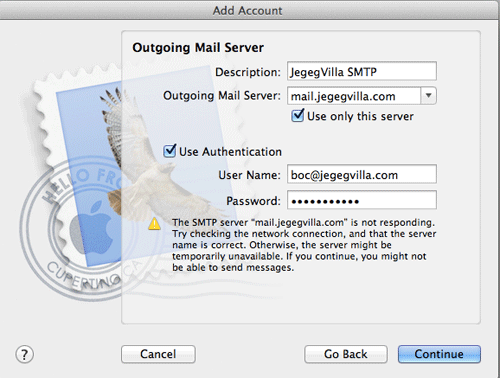
8. Make sure to un check on line Use Secure Socket Layer (SSL), authentication is password. Click Continue.
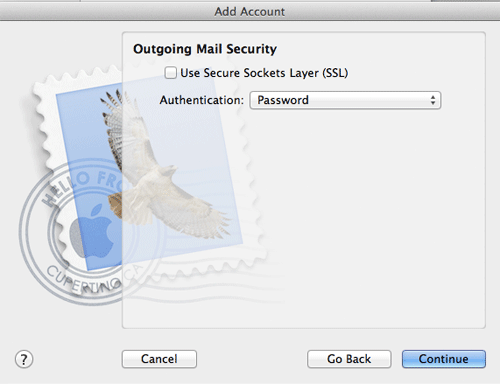
9. Account summary is showing up and make sure it has the same setting as shown below. Click Create.

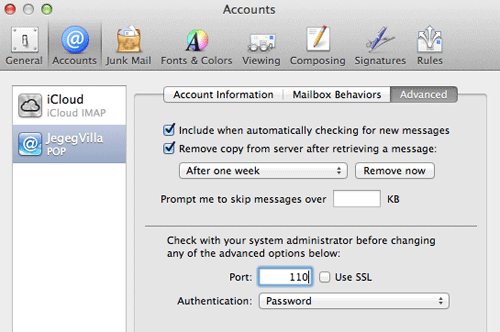
10. Back to top menu, click Mail > Preferences

11. On your POP setting, fill in 110 on port coulomb and un check Use SSL
12. Still at the same window, click Account Information tab. At Outgoing mail server, chose from dropdown list > Edit SMTP Server List
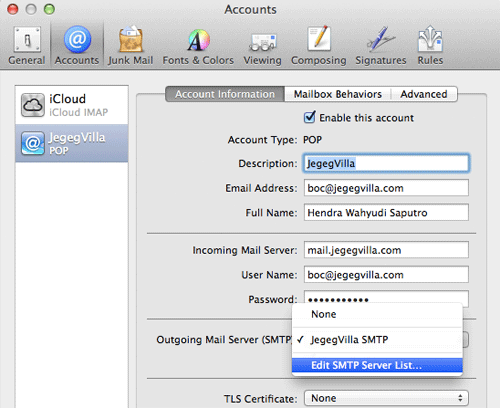
13. Click tab Advanced. Fill in 26 at Use custom port, un check SSL. If you want to have SLL, fill in 587 on custom port.

Close the window and QUIT The Mac Mail (not only close). Turn ON again The Mac Mail to use the last setting.

